Hello World!
If you're wondering why this blog has gone silent, I've focused my attentions on a new project that challenges and excites me- developing a totally vegan cooking and baking blog!
You can find it here.
Cheers!
Friday, May 4, 2018

Saturday, July 29, 2017
Maple Walnut Tarts- A Taste of Canada

This is undoubtedly one of the most important recipes I know of. Whenever I go with my family to the pick-your-own farm to spend a beautiful Ontario summer's day collecting berries and fighting mosquitoes, we'd always get the maple walnut tarts they sold. However, at their price it was unlikely that they were made with real maple syrup, posing me with the challenge of a more authentically mapley alternative. I also use a butter pie crust that's flaky and tastes amazing, complementing the filling rather than merely holding its nutty, gooey goodness. For such a fantastic food, it's incredibly easy as well- all you need to do is mix up the filling and pour it onto walnuts in parbaked pastry shells. You could use frozen tart shells... but please don't.

These taste best in the sunshine, especially sitting on the back of your car while surrounded by rolling fields of wheat and watching the trees rustle in the breeze, but at home while watching TV will also work. Just the taste will bring you to a happier place.

Maple Walnut Tarts
1 Recipe preferred pie dough
2 Eggs
2/3 C. Dark maple syrup
1/2 C. Brown sugar
2 TBSP (30 ml.) Melted butter
Pinch of salt
1 Tsp. Vanilla or maple extract
3/4 - 1 C. Walnut pieces
Preheat oven to 220℃. Roll out the pie dough and cut into rounds with a large glass. Push the rounds into the holes of a muffin pan to form tart crusts and prick well with holes using a fork. Parbake for about 15 minutes. Use a small glass or end of a rolling pin to push the dent in again if they puff up.
Mix eggs, salt, syrup, sugar, butter and vanilla/maple extract well. Place a tablespoon of walnut pieces in each parbaked tart shell and top with the egg mixture. Return to the over for another 15 minutes, or until bubbling.
Monday, April 3, 2017
Zitny Chleba- Czech Country Bread


Žitný Chleba
From Küchenlatein
150g. 133% Hydration rye sourdough
Prepare the sourdough the night before by mixing 64g. Whole rye flour, 86 mL water, and 10 g. Sourdough starter. Let sit at room temperature for 12-16 hours.
400 g. Bread flour
100 g. White rye flour
1/2 Tsp. Active dry yeast, or 10 g. Fresh yeast
10 g. Salt
300 mL Water
Some ice cubes, for baking process
Mix water (reserving 1 TBSP) into sourdough and dissolve yeast. Add to the flours and mix until a homogenous dough forms. Let rest covered 10 minutes, then mix the salt and remaining water and knead in, until the dough is smooth and elastic.
Let rise in a covered, oiled bowl until doubled, about 2-2.5 hours at room temperature.
Shape a large, round loaf from the dough on a well-floured surface. Let rise covered for 1 - 1.5 hours on a pan (totally flat without a "lip" so you can slide the bread off later) lined with floured baking parchment.
Preheat the oven to 220 degrees Celsius, with a baking stone or heavy heat-retaining baking pan inside. Set another rack below this one with a vessel such as a cake pan.
When the bread is ready (it will spring back if you poke it gently), poke it all over with a skewer to make docking holes and slide it onto the baking stone/pan. Toss some ice cubes into the vessel below the bread to make steam and close the oven door.
Bake for 30-40 minutes, covering with foil if the loaf browns before it reaches an internal temperature of 90 degrees celsius. Let cool for at least 2 hours before cutting.
Sunday, March 12, 2017
Cowboy Cookies

These are some really good cookies if you like a lot of chips and bits- Personally, I find that they've got just the right amount of stuff going on without going overboard. They're definitely easy to make and homey (ideal with a glass of milk!) but the sheer amount of chocolate, nuts and coconuts accentuated with the hint of spice and oaty backdrop makes them special.
Surprisingly, despite the relatively large amount of leavener, these turned out thin and chewy, the way I like 'em. I think that using pastry flour, which is lower in gluten, helped me get them this way, though I'd need to try with all purpose and pastry flour for comparison.
Possible adaptations that I would try include adding instant coffee granules, using chocolate covered peanuts instead of chips, or using milk chocolate chips. While I can't say why they're called "cowboy" cookies, I can say that these are definitely worth making.

Cowboy Cookies
1 C. Flour (I used pastry flour, all purpose is fine too)
1 Tsp. Baking powder
1 Tsp. Baking soda
1/2 Tsp. Salt
1 Tsp. Cinnamon (I used mixed cake spice)
1 Tsp. Vanilla extract
1/2 C. (113 g.) Butter, room temperature
1/2 C. Brown sugar
1/2 C. Sugar
1 Egg
1 C. Rolled oats (not instant)
1 C. Chocolate chips (I used bittersweet)
1 C. Walnut or pecan pieces
1 C. Unsweetened desiccated coconut
Preheat oven to 180℃.
Beat together the butter, sugar, brown sugar, salt and cinnamon until fluffy and homogenous. Add the vanilla and egg and beat until incorporated.
Add the baking powder and soda and beat in, then add the flour and beat until just combined. Using a big spoon, spatula, or you hands, mix in the oats, chocolate, nuts and coconut.
Divide into 12-18 balls and bake for 12-15 minutes, or until the edges of the cookies are just slightly browned. Let cool on the tray.
Wednesday, February 8, 2017
Alice Medrich's Buckwheat Linzer Cookies (Gluten Free)

Pardon the unassuming photograph and let me assure you that these cookies are delicious. They're both gluten and nut-free, and a great way to highlight the unique earthy flavour of buckwheat. I added orange zest and rum, which I feel is a great extra touch. You can use any jam that's dark and not too chunky, and vary the size and shape of the cookies to your taste.
The gluten free flours result in an extremely tender and delicate cookie, a bit more rustic than the traditional linzer cookie but in a very good way. It's the kind of cookie you can imagine forest fairies or something of the like eating with tea.
I think that the dough is also improved by the cream cheese, adding a touch of tang and also more tenderness. Because there isn't any gluten, there's no concern about overworking the dough, making these surprisingly easy to make.
While mine weren't very pretty, working with colder dough (I rushed the refrigeration step) will yield cleaner cuts and nicer-looking cookies- but the important thing is that they're delicious. Take care not to overbake the cookies, though; they are brown to begin with, so it can be tricky to tell when they're done.
Buckwheat Linzer Cookies
Slightly Adapted From Flavour Flours, by Alice Medrich
70 g. Buckwheat flour
65 g. Oat flour
55 g. White rice flour ( I used Thai white rice flour)
170 g. Butter
100 g. Sugar
Pinch of salt
Pinch of baking soda
70 g. Cream cheese
1 TBSP Rum (or water)
Zest of one orange
Blackberry, raspberry or red/black currant jam, about 1/2 C.
Preheat oven to 170℃.
Sift together the flours, salt and baking soda. Separately, beat together the sugar, cream cheese, butter and orange zest. Add the dry ingredients and rum/water. Knead to form a homogeneous mass and refrigerate for at least 2 hours.
Roll out between sheets of baking parchment and cut with a circular cookie cutter or glass. You can also form a large, thick log of dough prior to refrigeration and then use a wire or very sharp knife to cut circular slices, but then you will need to make sure the dough is very firm.
Cut out smaller shapes in half of the circles (I used a flower cookie cutter) and bake on a parchment-lined pan for 20-25 minutes. Let cool on the pan.
Spread the cookies without cut-outs with your jam of choice and top with the other half. Dust with powder sugar if desired.
Thursday, January 19, 2017
Dark and Moist Fruitcake


Dark Fruitcake
adapted from chowhound
3 Eggs
3/4 C. Butter (About 170g)
1/4 Tsp. Salt
1 Tsp. Cocoa
1 1/2 C. Flour
1 Tsp. Baking soda
1/2 Tsp. Each cinnamon, nutmeg and allspice
Zest of one lemon and one orange
1 Tsp. Vanilla
1 C. Dark brown sugar
1/4 C. Molasses
2 TBSP. Apricot jam, smooth
1 C. Dates
1 C. Figs
1 1/2 C. Mixed golden and dark raisins
1 C. Walnut pieces
1/2 C. Mixed diced peel
1/3 C. Currants
1/2 C. Dark spiced rum
1/4 C. Brandy (I used apricot brandy)
To Baste:
A generous amount each of dark spiced rum, (apricot) brandy and coffee liquor
Soak snipped fruits in rum 2-5 days in advance.
Prepare two 9'' loaf pans with butter and baking parchment.
Sift together dry ingredients and set aside.
Beat the butter, sugar and molasses together until smooth. Add the vanilla, jam, zest and molasses. Beat in the eggs and mix until homogeneous.
Add the dry ingredients and mix until smooth. Next, add the fruit and nuts and stir in until well-mixed.
Bake at 160℃ for 1 1/2 hours. Let cool before removing from pans and brushing with a mixture of the basting alcohols.
Wrap up in alcohol-soaked cheesecloth and plastic wrap and let ripen for 6-9 weeks in a cool well-ventilated place, unwrapping and brushing with the basting alcohol about once a week. If you check on them and they're already very moist with alcohol (this occurred after 4 weeks of the basting process for me) you can leave them be.
Serve on its own or covered in marzipan once ripe.
Sunday, January 8, 2017
Chewy Fudge Brownies sans Chocolate, Butter, and Leavening Agent...

I love a fudgy, chewy, dense brownie. I also love recipes that require very little planning ahead to get the ingredients ready (at least, when I'm working with the limited storage space of my tiny apartment-kitchen rather than the spacious home-kitchen where I can comfortably keep a huge arsenal of rarely-used substances) so this was a very nice recipe for me to find.

I didn't use any chocolate chips and instead doubled up on walnuts, because I love walnuts in almost everything and didn't feel like going out to buy chocolate. I add a bit of Kahlua instead of coffee to the liquid components, which is not necessary but it's really hard to go wrong with a touch of booze in any baked good.

Chewy Fudge Brownies
Adapted from King Arthur Flour
2/3 C. Cocoa
1 1/4 C. Sugar, or 1 C. sugar and 1/4 C. brown sugar
1/2 C. Powder sugar
1 Tsp. Salt
1 C. All purpose flour
2 TBSP Instant coffee powder or 1 TBSP espresso powder (optional)
1-2 C. Walnut, pecan and/or chocolate pieces
1/2 C. Neutral flavoured oil (I used canola)
3 TBSP Kahlua (or strong coffee)
3 Tsp. Vanilla extract
3 Eggs
Preheat oven to 180℃. Grease and line an 8'' x 8'' pan with baking parchment.
Whisk together the eggs, oil and normal sugar until relatively smooth (sugar will still be grainy). Add Kahlua/coffee, vanilla, and instant coffee/espresso powder (if using).
Separately, sift or whisk together the flour, powder sugar, salt and cocoa. Add the liquid ingredients and mix until homogeneous with a large spoon. Add nuts and/or chocolate.
Pour into pan and spread evenly, and bake for 45-55 minutes. Remove and let cool at least an hour before removing from the pan and cutting.
Thursday, January 5, 2017
Vanillekipferl
 |
| Kipferl in the foreground, walnut cookies in the back. |

To make them extra special and Christmas-worthy, use really good hazelnuts or hazelnut flour, good butter, and real vanilla extract or naturally-flavoured sugar. Don't skimp out! These are supposed to be a highlight of the holidays, after all. The other cookies in the pictures above, made with walnuts, will also be posted- at least, in time for next Christmas...
Haselnusskipferl
From chefkoch.de
560 g. All purpose flour
200 g. Ground hazelnuts (I used hazelnut flour)
2 Tsp. Vanilla extract, or 2 sachets of vanilla sugar
120 g. Sugar
1/2 Tsp. Salt
400 g. Butter, unsalted
About 1/3 C. Powder sugar
Cream butter and sugar, and add vanilla or vanilla sugar. Mix in the ground nuts and sift in the flour. Chill in the freezer for at least 1 hour.
Preheat the oven to 180 degrees. Cut into small pieces (about the size of large olives) and roll into logs, then bend to form crescents and place onto baking parchment.
Bake for about 10-12 minutes, until slightly browned.
Let cool completely before removing from the baking pan and dusting with powder sugar.
Sunday, November 13, 2016
Vegan Chocolate-Coconut Cake

This cake got astoundingly positive responses considering that it was totally improvised from what I had on hand, just because I really wanted to make a cake. Though it's got layers and frosting and everything, the amount of ingredients you really need is small, as is the amount of equipment: a pan, a bowl, a whisk and a big spoon should suffice. Most of the ingredients are pantry staples... or really cheap. Well, maybe you don't have coconut rum, but in my humble opinion it would be a very wise investment to buy some as it improves just about everything... like I said, my opinion.

The chocolate layers are moist, chocolatey, soft to the point of being crumbly, but that tenderness is not a bad thing provided you're careful when you cut up the cake. I was a bit skeptical, but I'd definitely recommend the cake to be used wherever you want vegan chocolate cake layers.
The icing inside is made with creamed coconut (sold in small 114 g. boxes in the Caribbean sections of many a Loblaws, or nearby the coconut milk. You can also use the coconut cream sold in cans, or the top thick layer that forms on canned coconut milk. Along with coconut rum, it makes a really nice filling that balances out the not-too-sweet cake. Topped with a bit of chocolate and toasted shredded coconut, the cake becomes a bit more attractive and has some more variety in texture.
Vegan Chocolate Coconut Cake
For the Cake:
1 1/2 C. Cake/pastry flour
1 TBSP Ground flaxseed (optional, but helps the cake rise a bit more in my experience)
3/4 C. Light brown sugar (you can also use 1/2 C. white and 1/4 C. dark brown sugar)
1/4 C. Cocoa powder
2 Tsp. Instant coffee granules (Optional, but adds flavour that complements the chocolate- you can also use weak coffee instead of the water)
1 1/4 C. Water (I used only 1 cup by accident- turned out fine)
1 1/2 Tsp. Baking soda
1/2 Tsp. Salt
1/3 C. + 1 TBSP Oil
1 TBSP Vinegar, white
2 Tsp. Vanilla extract
Margarine or oil, to grease the pan
Preheat the oven to 180℃. Line a 8''x8''/9''x9'' square baking pan, or a 9''/10'' circular pan, with baking parchment, and grease with margarine or oil.
Sift together the flour, cocoa powder, salt and baking soda. Separately, beat together the oil, flaxseed and sugar, adding the vanilla, vinegar and milk once the mixture is homogeneous and mix together until just combined.
Pour into the prepared pan and bake for 25-30 minutes, or until a toothpick poked in comes out clean. Leave the oven on for the moment- you will use it to toast the coconut garnish.
Remove from the pan once cool- let it cool completely, as the cake is very crumbly and fragile to begin with and is even more so when still warm. Chill in the refrigerator for about half an hour, then use a sharp serrated knife to cut through the centre to form 2 layers.
For the Coconut Filling:
1/4 C. Creamed coconut (the solid sort sold in boxes)- you can also use canned coconut cream or the thick top portion of a can of coconut milk, plus a little bit of coconut oil or margarine to adjust the smoothness of the icing as you see fit
1 C. Powder sugar
2-3 TBSP Coconut rum, or nondairy milk plus a little coconut flavouring
Beat together the coconut cream and sugar using an electric beater or a large wooden spoon, adding a bit of sugar at a time so it doesn't blow about everywhere. Add the coconut rum until a smooth, spreadable paste forms.
Spread the icing onto the bottom half of the cake and add the other half on top.
For the Glaze and Topping:
2 Oz. Semisweet or dark vegan chocolate
2 TBSP Creamed coconut, or coconut milk/cream
1/2 C. Unsweetened desiccated coconut
Spread the desiccated coconut on a pan and put into the oven- watch it carefully, as it burns easily! Have a cool plate or tray ready, and once the coconut turns golden brown (this can take anywhere from 1-5 minutes, so pay attention!) remove it and pour immediately onto the cool surface to stop the toasting.
In a microwaveable bowl, or another heatproof bowl set over a pot of boiling water, heat the coconut cream and chocolate until melted and mix well. Pour onto the cake and spread evenly. Sprinkle with the toasted coconut to finish. Refrigerate for at least half an hour before cutting.
Friday, October 14, 2016
Vegan Banana Nut Bread, Take 2

Ahh, nothing like the basics! Yes, I know that the world is overflowing with banana bread recipes as it is, but it's my firm belief that you can never try out too many, lest you miss out on "the one"- the banana bread that has just the right flavour, texture, moisture, sweetness and so on for your tastes. Everyone's is different, and since this recipe didn't require me to go get organic eggs, milk or butter from the natural foods shop (though that's the only way I'll buy them) I think it's definitely worth a shot.

This is a good one to make with limited kitchen equipment on hand- I didn't even have a loaf pan, so I used a large square cake tin, which worked very well and reduced the baking time. In spite of its very basic nature, it was well-received by those who tried it before me - someone at the lab asked for the recipe- that's a good sign!


Vegan Banana Nut Bread II
Adapted from BBC Good Food
225 g. Cake flour (All purpose is fine; I only had cake or bread flour available as options)
100 g. Brown sugar
75 g. Neutral oil (I used canola)
3 Tsp. Baking powder
1/2 Tsp. Salt
3 Tsp. Cinnamon
1 Tsp. Nutmeg, optional
2 Tsp. Vanilla
3 Large or 4 medium sized bananas, as ripe as possible
50-75 g. Walnut pieces
Some raw cane sugar or granulated sugar to sprinkle on top- optional
Preheat oven to 200℃. Grease a large loaf pan or square pan with a bit of oil and cover the bottom with greased baking parchment. Sprinkle with a bit of sugar and cinnamon
Sift or whisk together the dry ingredients (excluding the walnuts). Separately, mash the bananas finely and add the oil, sugar and vanilla. Mix well, until homogeneous.
Mix the dry ingredients into the wet ones and mix until just combined, then stir in the walnuts.
Pour into the greased pan and sprinkle with a bit more cinnamon and sugar, if you like. Bake in the middle of the oven for 40 minutes to an hour, or until a fork poked in comes out clean- cover with aluminium foil if it is browning too quickly.
Let cool before slicing.
Sunday, October 9, 2016
Lemon Loaf, with Lavender or Otherwise (dairy-free)
 |
| Shhh, ignore the bad photography and aluminium pan... |
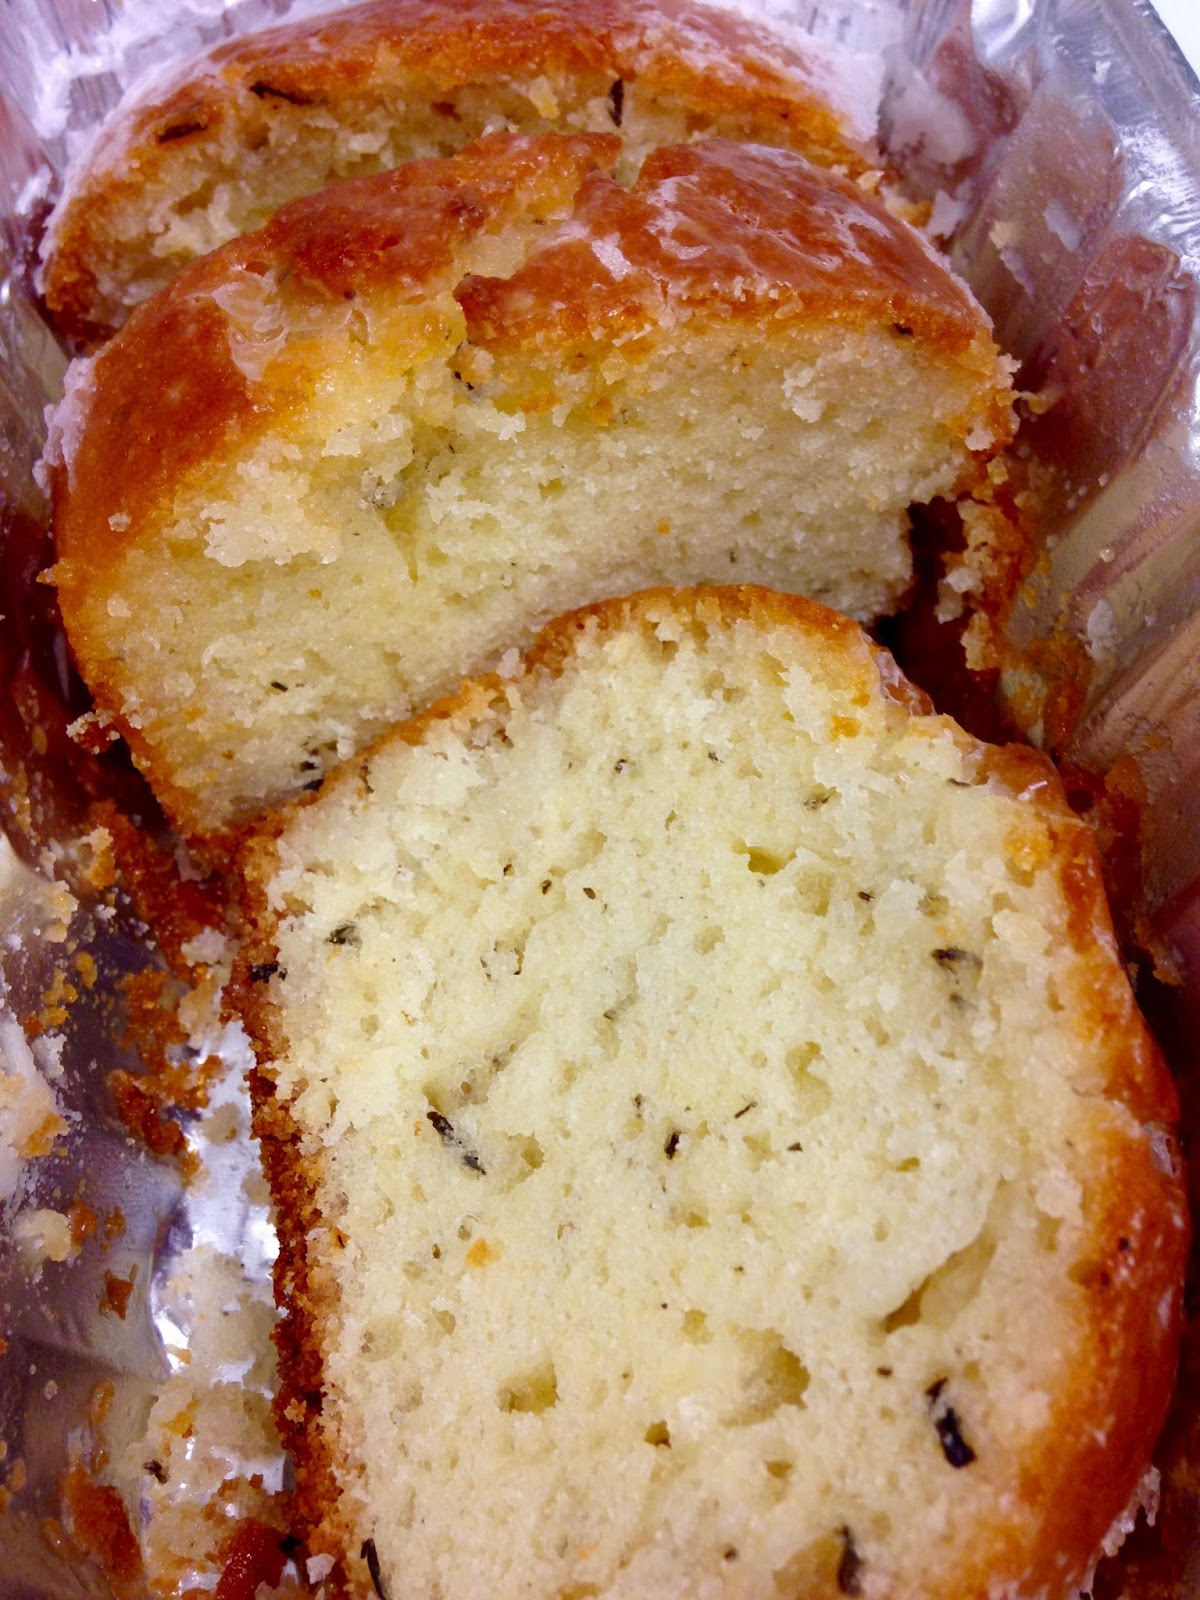
I was actually worried when I made this that people would be too weirded out to try it, but fortunately nobody was- and it turned out to be extremely popular! I mostly came up with this recipe because I had a few odds and ends of baking supplies left before moving, and I wanted something to use them all up. Since I had lemons, coconut milk, pastry flour and my mother's homemade lavender sugar, I went for this loaf.


Lemon (Lavender) Loaf
Adapted from Allrecipes.com
1 1/2 C. Cake flour
1 1/2 Tsp. Baking powder
1/2 Tsp. Salt
1 C. Sugar
2-3 Tsp. Dried lavender flowers or finely chopped leaves, or another complimentary flavour of your choice (1/2 C. dried cranberries, shredded coconut, 1 C. fresh blueberries...)
1/3 C. Neutral cooking oil, such as canola
1/2 C. Full-fat coconut milk
2 Eggs
3 TBSP lemon juice
Zest of one lemon, or 1-2 Tsp. Lemon extract
1 Tsp. Vanilla extract
For the Glaze:
1/3 C. Powder sugar
1-2 TBSP Hot water
1 Tsp. Lemon extract, or zest
Preheat oven to 180 and grease a 8" x 4" loaf pan.
Sift together the flour, baking powder and salt. Separately, beat together the sugar and oil, then add the eggs, coconut milk, lemon zest and juice, and vanilla.
Add the wet ingredients to the dry and mix until just combined, adding any additional flavourings of your choice at this point. Pour into the pan and bake for 1- 1 1/2 hours, or until a toothpick inserted deeply comes out clean. Remove from the pan after 10-15 minutes.
For the glaze, whisk the hot water into the sugar one spoonful at a time, along with the lemon extract/zest. Adjust until the thickness is about that of heavy cream. Pour half onto the cake after it has cooled for only 10 minutes, then the rest about 15 minutes after that to ensure you get a nice "shell" of glaze.
Wednesday, September 21, 2016
Vegan Stollen Rolls (Stollen-Schnecken)
 |
| Check out the cute edible gold stars I got. Totally festive, right? Even though it's autumn... |
That's why I love these rolls- they really taste like Christmas come early. And, to make the deal sweeter, they're actually vegan! I was skeptical, since butter is one of the predominant flavours in the Stollen that I know and love, but a little butter-vanilla essence (I used Dr. Oetker brand) goes a long way. The copious amount of vegan butter (I used a coconut-oil based brand called Melt that was very nice, but any that's marketed for baking will work)... or just plain baking margarine. After all, my Oma's old DDR cookbooks all call for it in their Stollen, making them inadvertently vegan as well.
These are nontraditional on more fronts than just animal product content, though- they also have a pudding-marzipan filling that tastes creamy and delicious despite being made with soya milk. You can also use almond milk, of course- it might be even better, so long as it's not reduced-calorie/fat.

I have but one warning- even when completely cooked through, the pudding-marzipan filling and marzipan in the dough makes these buns really, really moist- too much for some, I suppose- and you might want to make them a little drier by removing the marzipan in the dough (I went crazy because the blocks I had were getting close to their expiration date, and I didn't want them to go to waste) and not squishing your buns together when baking them like I did. I love it when baked good are really moist, though, so for me it's perfect the way it is.

One more thing- very, very rich. It may be tough to get through even one bun in one sitting. I still think it's worth is, since the taste is glorious. They're not tricky to make, so don't let the long instructions scare you- there's only a few simple components that you need to put together and then assemble. Like flatpack furniture but less aggravating!
Obviously you don't have to make them vegan, especially if the ingredients are hard to find- I had them available and I wanted to play with them and see how good they'd taste in pastry and if anyone would miss the dairy. Nobody did!

Vegan Stollen-Rolls
Makes 9-12
Adapted from Veganer Kuchen
For the dough:
500 g. Flour
150 ml Soya or almond milk
200 g. Marzipan, finely chopped or grated (or use 80 g. sugar)
1 Packet vanilla sugar, or 1 TBSP homemade
A few drops butter-vanilla extract (or 1-2 Tsp. if it's not the super-concentrated type in tiny glass tubes)
1/2 Tsp. Almond extract, optional
Zest of 1 orange or lemon
2 TBSP Rum, or 1 Tsp. Rum extract
2 Tsp. Stollen spices (or, mix 1/2 Tsp. each cinnamon, nutmeg, mace, and cardamom)
42 g. Fresh yeast, or 2 1/2 Tsp. Active dry yeast
150 g. Margarine or vegan baking-suitable butter, in cubes
Warm milk and dissolve yeast. Let sit 15 minutes.
Whisk together the flour, spices, zest and vanilla sugar. Add the milk mixture and all the extracts (and rum) being used. Knead until smooth, then add the chunks of marzipan one by one and knead until all are completely mixed into the dough. Repeat with the margarine.
Let rise in a greased, covered bowl for about 1 hour, or until doubled. After about 45 minutes, begin preheating the oven to 190℃. Then, roll out on a floured surface to form a large rectangle and prepare as in the following filling instructions.
For the Filling:
200 g. Marzipan, finely chopped
2 TBSP Rum, or 1 Tsp. Rum extract
250 ml. Soya or almond milk, plus more as necessary
1 (43 g.) Packet Dr. Oetker vanilla, almond or cream flavoured pudding powder (or, use corn/potato starch)
1 Packet Vanilla sugar, or 1 TBSP homemade
100 g. Margarine or vegan baking-suitable butter (you can cut this to half or even omit it)
Whisk together pudding powder, soya/almond milk and vanilla sugar. Bring to a boil and let thicken. Stir in the margarine and marzipan and whisk until thoroughly combined. add the rum and more of the milk to thin as necessary to get a pastey, spreadable consistency.
Let cool slightly until just warm, then spread across the dough rectangle, leaving about 1 inch of room on one of the long sides of the rectangle. Finish with the dried fruits, as following.
For the Dried Fruit:
150 g. Raisins, sultanas and/or currants
50 g. Candied orange peel, chopped finely
50 g. Candied citron peel, chopped finely
75 g. Almonds, chopped or slivered
1/4 C. Rum, optional
Cover the fruits with rum, if using, and enough hot water to cover them up in a bowl. Let sit at least 30 minutes, then drain.
Sprinkle evenly across the filling and roll the whole thing up like a jelly roll, finishing so that the long side with the clean edge is rolled up last. Use this clean end to stick the roll together and seal the "seam".
Using a sharp knife, wire or floss, cut the resulting log into 9-12 pieces. Arrange on a baking tray lined with parchment, or in a greased baking dish.
Bake for about 1 hour, covering with aluminium foil after about 20 minutes to avoid overbrowning. They are finished when they reach 190℉ or 90℃ inside.
To Finish:
50 g. Margarine or vegan baking-suitable butter, melted
1 Tsp. Vanilla extract, or a few drops butter-vanilla extract
Powdered sugar
Mix melted margarine and extract.
While the rolls are still warm, brush with the margarine mixture. Once cool, sprinkle with powdered sugar.
Saturday, September 10, 2016
Roasted Eggplant and Fried Halloumi Sandwiches


I feel like I've invented a new classic of quick and easy crowd pleasing food. Though normally I'm not fond of the idea of sandwiches for lunch or dinner at home (I grew up with a constant deluge of repetitive sandwich lunches, so they scream "on the go" to me), these are really hearty, satisfying and delicious. The eggplant takes on a new depth of flavour when you roast it, especially with a bit of za'atar, now very trendy even here in Anglo-Saxon Suburbia and available in the local grocery stores. The eggplant becomes almost smokey in flavour, and has even impressed my supposedly eggplant-disliking brother.

The deep, rich flavours of the star ingredients are balanced out with a super-simple combo of zesty lemon and parsley. A few cherry tomatoes for some freshness, and you're good to go. I've made this with both sandwich rolls and pita breads to equal effect- use whatever you prefer.
Roasted Eggplant and Fried Halloumi Sandwiches
Makes 4 big sandwiches
4 Submarine sandwich rolls, or pita breads
1 Large eggplant, in 1 cm thick slices

1 Lb. Halloumi, in 1 cm thick slices
1 C. Parsley, roughly chopped
Juice of half a lemon
1 C. Cherry tomatoes, halved
Salt, pepper and plenty of olive oil
1-2 TBSP Za'atar, optional (You can also mix 50/50 sesame seeds with dried thyme to simulate it)
Cut open the sandwich rolls to make a large "pocket" with a sharp knife, but not all the way through so that the knife goes through the other side.
Mix the parsley with the lemon juice and a pinch of salt and pepper and set aside.
On a baking tray, drizzle some olive oil and evenly place the eggplant slices. Sprinkle with salt and za'atar if using, and drizzle on more olive oil. Bake at 250 for about 15 minutes, or until the eggplant is very soft. Change to a broil setting and let brown, then flip with a spatula and let the other side brown. You can also fry the eggplant slices in a large skillet on medium-high heat until both sides are well-browned, but this will take more oil to keep the eggplant from burning.
Fry the halloumi slices in a skillet or frying pan with a drizzle of olive oil until the bottom is covered with crisp brown "cow spots", about 2 minutes on medium-high heat. Flip and fry the other side, then transfer to a paper-lined plate to drain of oil.
If you want a softer sandwich, peel the skin off the roasted eggplant slices, as they get quite hard after baking- they should come right off.
Into each roll, add an equal portion of eggplant, halloumi, the parsley mixture and cherry tomatoes. Serve immediately.
Tuesday, August 23, 2016
Peanut Butter Coconut Honey Cookies

Not very good-looking, but very delicious- especially with a glass of milk. The flavour of coconut and peanut go extremely well together, plus the classic pairing of peanut butter and honey, makes for a soft, chewy, moist, very sweet cookie. The generous amount of peanut butter ensures that they really do taste mostly like peanut, and if you fear that using shortening instead of butter will make them less tasty, keep in mind that the shortening is what allows them to be so soft and tender. With all the other stuff going on, you won't miss the butter.
If you use extra-fine shredded coconut and smooth peanut butter, you can make your cookies prettier, as they'll better hold the criss-cross pattern on after baking. Nonetheless, they'll taste good even if you don't bother. The dough is really easy to work with and freeze for later, as are the finished cookies.

Peanut Butter Coconut Honey Cookies
Makes 24-30 cookies
Adapted from King Arthur Flour
1/3 C. Vegetable shortening
1/2 C. White sugar
1/4 C. Brown sugar
1/4 C. Honey
1 Egg, lightly beaten with a fork
3/4 C. Peanut butter, American style (made with roasted peanuts, not raw) (I used 'Earth Balance coconut and peanut spread')
1/2 Tsp. Salt
1 1/2 C. All purpose flour
1 Tsp. Baking soda
1/2 C. Shredded dessicated coconut
Preheat oven to 180℃. Line 2 baking trays with baking parchment.
Beat together the shortening, both sugars and honey with a stand mixer or a wooden spoon. Mix the egg and salt separately, then mix in. Add the peanut butter and mix until smooth and homogeneous. Sift in the flour and baking soda and mix well. Stir in the dessicated coconut at the end.
Refrigerate for around 20 minutes if the dough is too soft. Roll into 24-30 balls by hand and spread evenly on the baking pan. push them down with your palm until they are about 1 cm thick and use a fork to score the tops both vertically and horizontally to create a cross-hatch pattern. Sprinkle with additional sugar if desired.
Bake for 12-15 minutes, or until just the edges begin to brown. Let cool for about 15 minutes before removing from the trays.
Subscribe to:
Posts (Atom)